

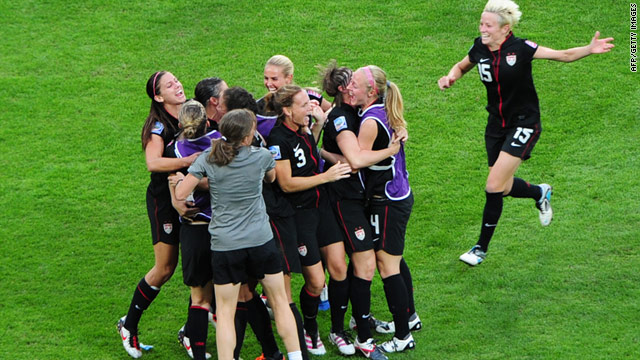
I made some antlers while watching the Woman's World Cup Soccer game. USA was losing to Brazil, but never gave up and came back to win in penalty kicks. AMAZING Game, Go USA! Anyway, sorry if you aren't a soccer fan.
I rarely sit and do nothing while I watch TV. Especially since my little Roscoe isn't around to cuddle with me. Right now more than ever I need to keep my brain busy with multi-tasking,
I miss her so much.
I'm sure you have seen many images of antlers floating around out there lately in blogger land.
I would never want to hurt a real Bambi so I made faux ones.
I miss her so much.
I'm sure you have seen many images of antlers floating around out there lately in blogger land.
I would never want to hurt a real Bambi so I made faux ones.


I think these are real too.

Here are mine. First attempt, please be kind I'm still in mourning.
Mine cost me nothing to make because I used stuff I already had.
My favorite projects are frequently free.
My favorite projects are frequently free.

I needed a base to mount my antlers on so I used a large clam shell. I love shells and have sooo many. A beveled piece of wood cut in the shape of a shield would look great but I was watching the game and didn't feel like driving to my parents house to have my dad help me cut wood.
I used several strands of wire wrapped together to create my antler shape in my workshop (my kitchen island).

I hot glued a piece of scrap leather to the shell. My thinking was the leather would create a nice surface to glue the wire to the shell. It worked great.

The Ballard's antlers have an acanthus leaf motif on their base that I liked so I created a simple one with more leather scraps and hot glue. It doesn't matter what color you use it's all getting painted.

I hot glued the wire antlers on to the shell and added an extra piece of leather over the wire leather connection for more stability.
Right now it's looking very ugly with the red leather.
I could tell my husband was not impressed, more confused then anything else? He knows my emotions are fragile right now and has learned in the interest of marital harmony to not judge my projects till I'm finished. When I'm done I welcome his opinion even if it's not positive. He usually has great insight and can pin point things I need to fix or change. He's from New York and doesn't hold back on being blunt and to the point. I love this quality about him. I just like him to wait till the project is finished before passing judgment. Come to think of it he still hasn't said anything about the antlers? Maybe I shouldn't be sharing this project yet?

I wrapped the wire in tape to give it some girth.


Next I made Paper Mache and wrapped the tape in thin strips of newspaper. The Paper Mache glue is one part flour to 2 parts water. Glue is made from flour? Glad I don't eat gluten anymore. Who needs to be eating glue?

Just cut thin strips of newspaper and dip it into the flour water mixture and wrap it around the tape antlers. Sorry no pictures of the newspaper process, yucky fingers at this point of the project.

I let it dry outside in the hot sun and watched more soccer, double overtime, plus an added 3 minutes because of injury timeouts. I guess the Brazilian player shouldn't have faked an injury or Abby Wambach wouldn't have had time to score the the game tying header goal for the USA.
On to penalty kicks.
We Won!!!!
When I grow up I want to play goalie like Hope Solo.

It was really hot outside so the antlers dried fast on my concrete patio.
Make sure your paper mache is really dry before you paint. I hate the waiting part.
I was making this up as I go and really wasn't sure what I was doing, but I do know it needs to be dry.
The antlers seemed a little too rough so I added a thin coat of caulk to smooth it down and fill in the cracks and blemishes in the shell. Still not smooth enough. I would not do this step again. I needed to use a medium that I could sand like Bondo, or wood filler, or even joint compound.
Oh well, most of my DIY projects are trial and error.

I ended up using a little wood filler but didn't get a picture of it. Messy fingers again.
LET IT DRY
(this is more for me then you, I'm not very patient)
The next day I added a couple coats of white spray paint.

I hung it in my office for now but I'm going to make more and create a collection on a wall.
Not sure where yet or how many?
Have you created any paper mache or clay projects lately?
Have you seen a better way to make these? I would love your feedback.
Thanks for Checking it Out.


Nifty Thrifty Tuesday
Thats stinkin impressive right there!
ReplyDeleteWow!! What a great idea!! I just happened upon your blog and I have to say - I'm impressed!!! I've always had a thing for antlers and stuffed heads - totally fake made out of fabric kinds...not real heads.. (that would make me cry!!) But I just might have to muster up some energy and try your method... can't wait to see what else you've got going!! Blessings!
ReplyDeleteI love this! great job with your antlers!! I am all about free too, so even if what I've got around the house isn't the most convenient for a project, it's usually preferable to going out and spending money. You did great!
ReplyDeleteI'm so sorry about your sweet little dog. As irritated as I get with mine sometimes when they are constantly underfoot and tripping me, I know I will miss it terribly someday when they are gone. I'm sad for you that you had to say goodbye to Roscoe.
what a creative project!! this is the stuff i buy! i should make it and save myself some dough!! i need to be better at doing DIY projects. i paint...thats about it! i am also so sorry about your dog. :(
ReplyDeletewww.moddybee.blogspot.com
Oh, I wish that was the case Shannon!! (about that house) But it's waaaay out of our price range right now. Like hundreds of thousands out. I forgot to tell you we're moving so my husband can start law school. So the budget's about to get TIGHT. I keep fantasizing that maybe it'll still be available when he's out of school, but I'm sure in 3 years someone will snatch it up. (sniffle sniffle). I wish I could have it though; I really love that house!!
ReplyDeleteI'm so sorry about your dog. :( I just clicked over to that post and it made me tear up. I don't have kids yet, so my kitties are my babies, and I get emotional when I hear about losing pets, especially ones who were obviously so well-loved. That picture of her paw prints is cute-don't you love how they "help" with projects? :)
ReplyDeleteOn a happier note, I can't believe you made those! That first picture of them looks like they came from a store! Too funny about your husband's comments. The only thing I've ever paper-mached was a balloon in elementary school...I think we made it into a globe? :)
Ok that is pretty good, girl! Seriously! And I'm so glad I'm not the only crazy one out there paper mache-ing animals for decor : )
ReplyDeleteWow! What a neat idea! great job on your antlers!!
ReplyDeleteget out! I love projects like this...very cool!!
ReplyDeleteI'm so glad that I happened upon this post of yours! I was just telling my husband that I wanted to buy antlers [real] to create a jewelry display & he pointed out to me that it would probably be pretty expensive. So DIY, I must! This is awesome. Thank you so much!
ReplyDelete