
So maybe you aren't as old as I am and you don't remember when macrame plant hangers were all the rage in home decor. I was born in the 60's and remember making macrame plant hangers as a kid. This is my attempt to update those cool macrame plant hangers and I made it for free.


Here's mine I made from stuff I already had laying around the house.

Some people are "stress eaters," I'm a stress DIY project maker. When I get bombarded or overwhelmed with too much to do, I make stuff. Weird, but it's like meditation for me and I don't gain any extra lbs. while doing it. I've also discovered I use DIY projects to avoid cleaning my house.
I've had these napkin rings forever. I like the little bit of sparkle from the beads with the rustic texture of the rope.

I started by playing around with the napkin rings and the rope. I held the three strands of rope together in the middle and folded them in half. This created the top loop and gave me six strands to create the plant holder part with. I slipped a napkin ring over the loop at the top and started working my way down. It took me a few tries to come up with a workable solution on how to hold the planter. I'm sure there are macrame tutorials out there, but what fun is that?

This creates the top loop to hang it from a hook and six strands to create a rope basket to support the planter.


The single bulb light always made me feel like we were getting interrogated when we ate at the table. I replace it with a chandelier shortly after moving in. The chandelier was brown. I painted it this gray gold aged color.

I had an old stopper from a broken piggy bank that fit the hole in the bottom of the glass perfectly. It doesn't seal water tight, but it prevents the rocks and dirt from seeping through the hole. If this was going inside my house, I would have used aquarium sealant to waterproof the bowl and stopper.

I added a layer of rocks to the bottom.

Next I used a layer of coffee filters weighted down with a few rocks. This keeps the dirt from clogging up the drainage hole.

Next I added a cactus soil mix and succulent cuttings that I cultivated from my yard. I've been growing succulents for over fifteen years and because of their popularity I have seen their prices double in recent years. It's so easy to grow your own, you just need patience. Every single one of these cuttings will turn into a whole new plant.

Just take a cutting and stick it in some dirt. That's it! Water ever so often and you get a new succulent. See these cutting are starting to make new buds. This cutting is about 2-3 months old? Cuttings spend all their energy making a new root system before you see any growth above ground, so don't get discouraged if you can't see anything happening. As long a the cutting remains "plump" and doesn't dry out, it's spending energy growing under the dirt.

I carefully removed the cutting from the soil so as to not ruin the new root system and plopped it in to it's new home. For this delicate job I used a very high tech. tool, a table spoon.

This planter will take time to completely fill in but I can be patient.

I topped the cuttings off with some glass beads I had left over from an old project. The glass gives it a finished look until the cuttings have time to fill in.
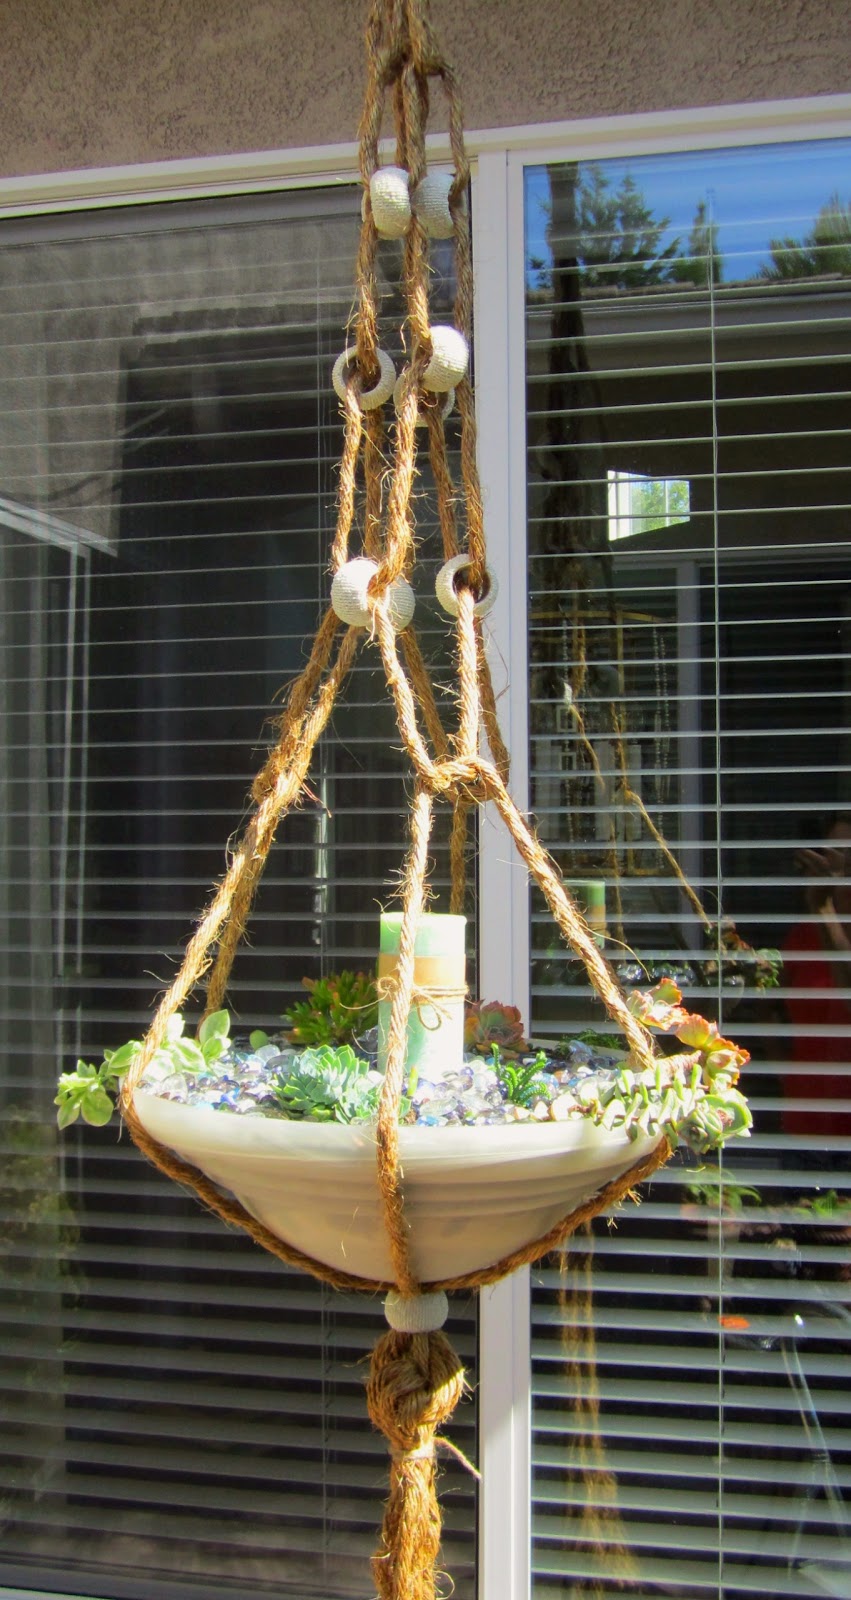
I added a candle to the center for night time entertaining.
If you add a candle make sure it's not close to your ropes or you will burn the house down.

I hung the planter at eye level so it can be enjoyed while passing by.

This is very HEAVY when watered so make sure you have a strong enough hook to support the weight.

I can see it from my office/living room while I'm working on the computer. When the succulents bloom next spring the Humming Birds will visit it daily.

This is the view from my kitchen while I'm doing dishes.

I like re using stuff I already have and it was fun revisiting this childhood craft again. My house is still dirty, so it's time to put the projects away and go get the dirty work done!
This is the 70's version I remember as a kid.

I started with rope. This was a single thick strand of about 30' that I divided in to three strands for another project that never came to be. Sometimes my ideas don't work out so I saved the rope for another day. Another day is here. It was very time consuming separating the rope into three strands. I don't recommend it. I would buy the size and thickness you need and skip the separating.

Some people are "stress eaters," I'm a stress DIY project maker. When I get bombarded or overwhelmed with too much to do, I make stuff. Weird, but it's like meditation for me and I don't gain any extra lbs. while doing it. I've also discovered I use DIY projects to avoid cleaning my house.
I've had these napkin rings forever. I like the little bit of sparkle from the beads with the rustic texture of the rope.

I started by playing around with the napkin rings and the rope. I held the three strands of rope together in the middle and folded them in half. This created the top loop and gave me six strands to create the plant holder part with. I slipped a napkin ring over the loop at the top and started working my way down. It took me a few tries to come up with a workable solution on how to hold the planter. I'm sure there are macrame tutorials out there, but what fun is that?

This creates the top loop to hang it from a hook and six strands to create a rope basket to support the planter.

Here's what I came up with. The white bowl is the original glass from the light that was installed over our dining room table. I turned it upside down for this project to create my planter.

The single bulb light always made me feel like we were getting interrogated when we ate at the table. I replace it with a chandelier shortly after moving in. The chandelier was brown. I painted it this gray gold aged color.

I had an old stopper from a broken piggy bank that fit the hole in the bottom of the glass perfectly. It doesn't seal water tight, but it prevents the rocks and dirt from seeping through the hole. If this was going inside my house, I would have used aquarium sealant to waterproof the bowl and stopper.

I added a layer of rocks to the bottom.

Next I used a layer of coffee filters weighted down with a few rocks. This keeps the dirt from clogging up the drainage hole.

Next I added a cactus soil mix and succulent cuttings that I cultivated from my yard. I've been growing succulents for over fifteen years and because of their popularity I have seen their prices double in recent years. It's so easy to grow your own, you just need patience. Every single one of these cuttings will turn into a whole new plant.

Just take a cutting and stick it in some dirt. That's it! Water ever so often and you get a new succulent. See these cutting are starting to make new buds. This cutting is about 2-3 months old? Cuttings spend all their energy making a new root system before you see any growth above ground, so don't get discouraged if you can't see anything happening. As long a the cutting remains "plump" and doesn't dry out, it's spending energy growing under the dirt.

I carefully removed the cutting from the soil so as to not ruin the new root system and plopped it in to it's new home. For this delicate job I used a very high tech. tool, a table spoon.

This planter will take time to completely fill in but I can be patient.

I topped the cuttings off with some glass beads I had left over from an old project. The glass gives it a finished look until the cuttings have time to fill in.
I added a candle to the center for night time entertaining.
If you add a candle make sure it's not close to your ropes or you will burn the house down.

I hung the planter at eye level so it can be enjoyed while passing by.

This is very HEAVY when watered so make sure you have a strong enough hook to support the weight.

I can see it from my office/living room while I'm working on the computer. When the succulents bloom next spring the Humming Birds will visit it daily.

This is the view from my kitchen while I'm doing dishes.

What do you do when you're stressed or avoiding house work?
Thanks for checking it out.


