Showing posts with label jute rope.. Show all posts

Wednesday, May 23, 2012

$4 Jute Light


The Man Cave makeover continues and here is the latest $4 transformation. 
This is the track home, builder grade light in our entry that came with the house. 
I gave it a little makeover last week.


I have never liked this light fixture, but it's 15 feet in the air and I could never decide what to change it out for?  I found nice lights, but if you have been a follower of my blog for awhile, you know I'm a tad frugal when it comes to buying lighting.
It's so much more fun to make my own for pennies less.

This is how the room looked before paint and the light makeover. 


Here is the after.
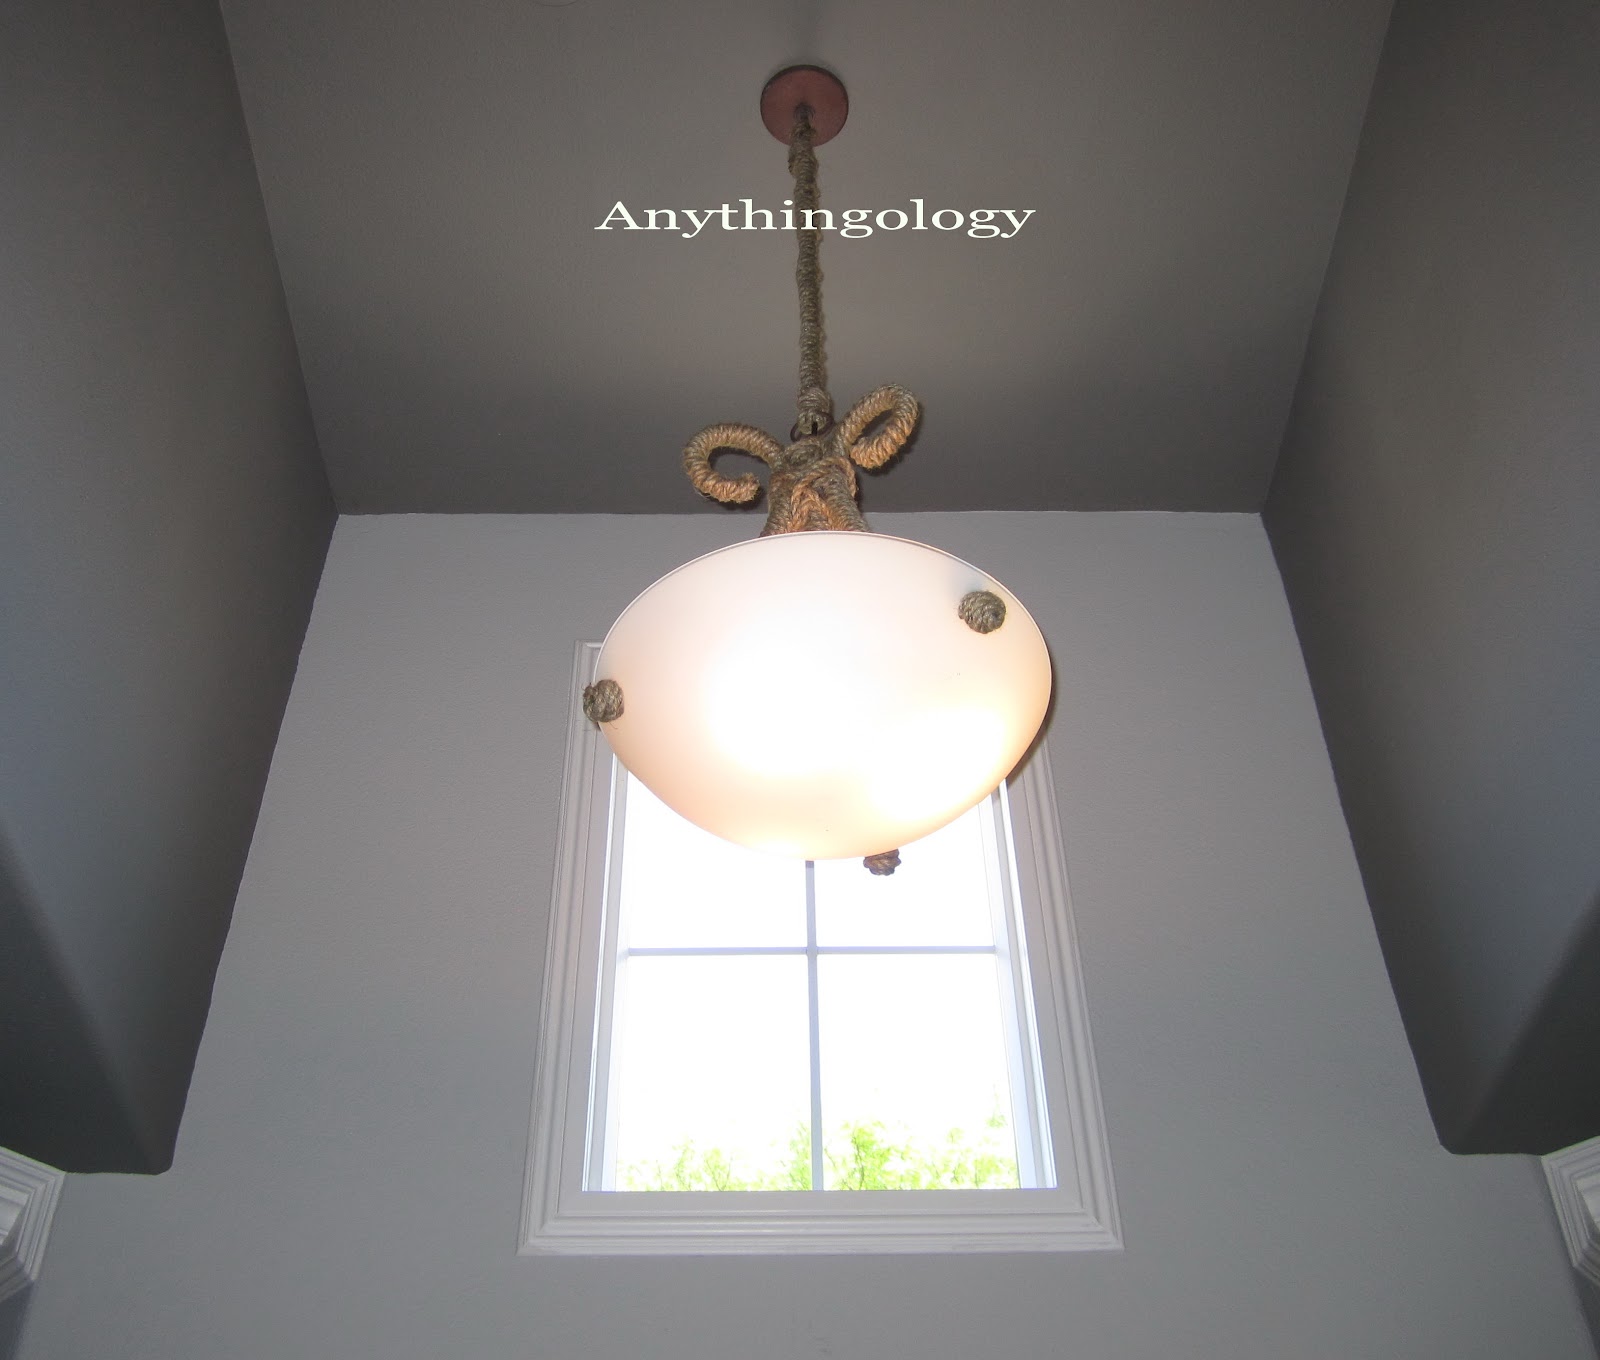
Painted, new completed crown molding and window casings, and the same light with a jute rope makeover.


I had left over rope from my DIY Restoration Hardware Planetarium Knock Off Chandelier. 
Say that five times fast.
To see how I made this fixture for under $50 with hula hoops, an old brass light fixture, and jute rope go

The electrician was able to come back and add the j box to the ceiling.  What a production, he had a tough time getting the wires through the attic and I got to help fish them through the hole while he crawled in the attic up above. 
I finished off the light with a ceiling medallion.
The room is so much more inviting at night with the new light and it's on a dimmer.


Here is the inspiration for my new entry light. 
Coastal Chic Rope Chandelier from Shades Of Light.
$999
"999 are you out of your mind?"


I took $4 roll of 50' x 3/4" jute rope that I picked up from Big Lots and hot glued and wrapped it over all the metal parts of the fixture.  It's not rocket science.  Just wrap and glue.  It took almost the whole 50' roll of rope.  I taped up my fingers with athletic tape BEFORE I used the glue gun this time.  I'm happy to report no blisters and no cuss words were yelled that would make a sailor blush this time.  I didn't bother to take down the light to wrap it in rope.  I carefully balanced on an extension ladder and wrapped and glued.  I would recommend taking the light down, I'm just lazy. 
It's much safer to do this on the ground.

Here is what it looks like closeup now.  
If I find something better to hang here, I'm only out $4.
Can't beat that.  OK, I guess free beats it.


It'll do for now. 
It only took me eleven years to do something about my most unliked light in the house.
The jute rope is a little fuzzy close up, but from the ground you can't tell it needs a shave.
The ceiling in this entry alcove is 15' high.


Here is a picture of the two lights together. 
They are totally different, but now they go together. 
 I like that they aren't too matchy, matchy.


I love solving design problems with inspiration, creativity, a little DIY,  and not big bucks. 
$4 fits my budget. 


I still have one more roll of jute rope left. 
Who will be my next makeover victim?

Thanks for checking it out.


Thursday, April 26, 2012

Restoration Hardware Rope Planitarium Chandelier Knock Off

Happy Thursday!
First off I want to thank everyone that left such supportive comments about my last post.  The Downside of Coaching.  I made all the team cuts and talked with every girl and many parents too.  So far the athletic director has received no complaints, so that's good news.  It was a hard day, but it had to be done. 

Some people over eat when they are stressed, I do projects.
I wanted to show you my latest project for my husband Henry's room.  Here is the light fixture I pinned awhile back.  It's from Restoration Hardware and it's on sale for $675.  What a deal!
Not in my budget, so I made my own version for $50.

Sale $675

Rope Planetarium Chandelier Medium

Here is mine that I made for
under $50 and some burned fingers.


This is what I used to make it.
An old $20 light fixture from H for H.  3 hula hoops from Big Lots( total $9.)  The hula hoops at Big Lots came in three sizes.  I chose the medium sized ones.  They are about about 27"-28" in diameter?  I used a total of 4 rolls of 50' x 3/8" rope from Big Lots (total $16).  I didn't know how much rope I needed, so I bought 6 rolls.  I can take back the two extras or save them for another project.  A can of black spray paint that I already had.  Duct tape that I already had. 


First I took the light fixture apart, I only need the guts for this project.  I'll save the glass for another project.  I drilled a hole in one of the hula hoops and threaded the top of the chandelier through the hole and screwed the loop on to secure the end.


Next I duct taped the other two hula hoops to the drilled hoop.  I had to play around with this step to get the proportions right.  It helps if you can hang the chandelier up and step back to check it out from all sides.


Next I spray painted the whole thing black.  I kind of liked it like this and probably will make anther light using the hula hoops without the rope.  I would have to do a neater tape job or hot glue the hoops for a cleaner look.


Next I started wrapping the hoops with the jute rope.
Once I hung it up in the room, I realized I needed to adjusting the hoops to make it look more symmetrical.   The tape pulled the paint off, but it doesn't matter, the rope will cover it up.


I burned my fingers so I had to tape them up with athletic tape for the rest of the project. 
 I have some nice blisters today.


The rope part of the project is very time consuming. 
Wrap and glue, wrap and glue. 
I cut the rope into manageable 6' sections and watched Nate Berkus to pass the time.


I cut the rope into smaller pieces and glued it into any holes I missed.


Do you think I should cover the candle stems? 
I didn't because they are skinny and close together and my fingers needed a break.
Yes, I have a lazy streak.
I predict more burned fingers if I cover the stems.

I can't show you any pictures of my chandelier lit up yet until the electrician comes back to add a J box to the center of the room.  He has been ill and I'm not sure when he will be able to come over? 
Adding the J box is beyond my electrical capabilities. 


The room is coming along slowly. 
I'm always amazed by the bloggers that can do a complete room make over in a weekend. 
I just don't work that fast!
Thanks for checking it out.


To see other lighting projects I've done click on the links below.


 Photobucket

DIY Show Off
Related Posts Plugin for WordPress, Blogger...