Showing posts with label chandeliers. Show all posts

Wednesday, February 8, 2012

DIY Paper Art and Our Master Bedroom

I re-purposed an old picture to create some new art work for our old master bedroom. 


Here is the completed new piece that I created with Mod Podge and paper.


The original picture has been sitting in my closet since I re-did our master five years ago.


I used paper that I purchased from Anthropologie after Christmas. 
It was 50% off the sale price.


The picture was solidly glued to the back of the matte so I just Mod Podged right over it.


I cut the paper and started adding layers.  I brushed the Mod Podge over the paper.
Next a I added the circles.  I ran out of Mod Podge before I was done so I made my own out of watered down white glue.   It seemed to work fine.  I let the whole thing dry over night.


Here it is over our bed. 
Not sure it's going to stay there? 
The whole project cost me $6, so for six bucks I'll live with it for now.
I think a gallery of pictures might look better? 
That might take another five years to change.


We purchased the bedroom set when we moved in eleven years ago.  We had a couple mismatched dressers and a bed frame prior to moving here.  I didn't know any better back then so I purchased a whole matching set, bed, armoire, dresser, mirror, and nightstand.   I won't make that mistake again.

I still like the five year old paint job. 
The paint looks more gray in real life.  In the pictures it's reading more blue than it really is.
 I painted the walls BM 1563 Quiet Moments and the ceiling is one shade lighter than the walls,
 BM 1562 Healing Aloe.  Speaking of Benjamin Moore paint, what's going on with their pricing?  The price has gone up three times in the past year.  A gallon cost about $50 now.  I love their paint, but I'm wavering on my customer loyalty at these prices.
What's up Ben?

This is where Piper likes to sleep when I'm working in this room or getting ready in the adjacent master bathroom
The ottoman originally went with our couch. 
I slip covered it in animal print many, many years ago and moved it in here.


Piper as a poster. 
Thanks Picnik, wish you weren't closing down.


My dad helped my husband and I do the molding in this room when we first moved in.  We have ten foot ceilings and the puny crown molding we started with was too small for the ceiling height.  We added chair rail below the crown and smoothed joint compound between the two pieces to make it look like one large piece.  Painted all the same color, you can't tell it's two separate pieces.


Directly across from the bed on either side of the entry into our master bath, I placed two matching bookcases to flank the doorway.  These bookcases used to be in my daughter's rooms.  I just moved this one in our room because I found bamboo shelves for Casey at a thrift store and she didn't need this any more.  I took possession of Cami's bookshelf after I re-did her room last year.  These were a garage sale find that I picked up for $50.  They are solid oak and very well made.  I painted them distressed white and added the legs to the bottom to add height.
I'm still playing with the arrangement and not quite set on the whole arrangement.
Those picture might become part of the gallery over the bed.


This lamp needs some help, at least a new shade. 
 I've decided I definitely need some more pattern in the room. 


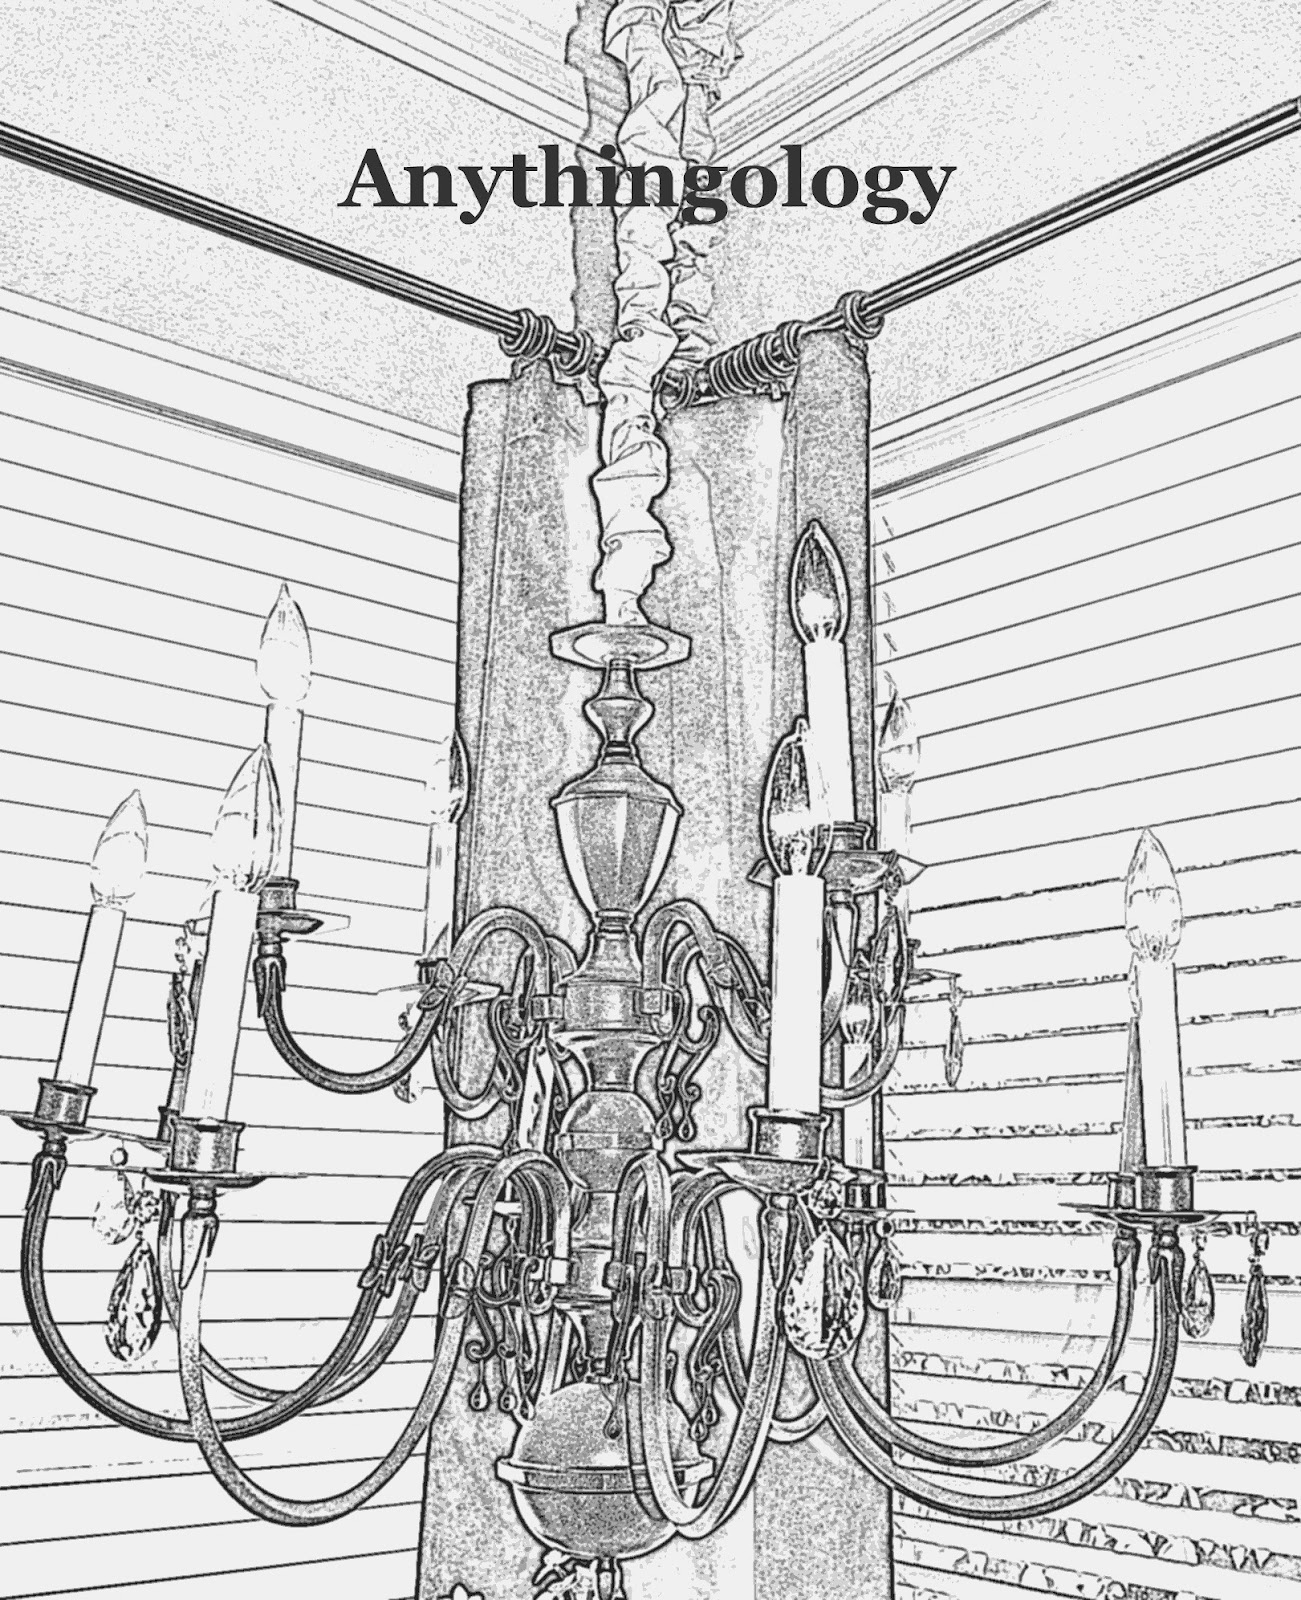
On either side of the bed I hung H4H brass chandeliers from the ceiling.  I painted them pale silver and let just a hint of the brass finish peak through.  I drilled each bobeche before painting and hung a single crystal from each arm.  My magnetic crystal drops don't work on brass.  The chandeliers have been re-wired so they plug into the wall and they are on dimmer switches for light control. 


The bedding is simple grays, silver, and black.  I picked up the separates from Home Goods.  Since chandeliers are more feminine I balanced them out with more masculine bedding.  I figured I could go girlie with the chandeliers because the large dark furniture is more manly.


I know I hung the drapes too low. I've been lazy and haven't gotten around to adding extra length to the bottom of the panels and raising the rods to the bottom of the crown molding.
Maybe posting this will motivate me to finally fix them.
Come on, I've only lived with them like this for five years!
Nothing like a picture to highlight what's glaringly wrong with a room.


Maybe I should take pictures of my outfits to figure out where I'm committing fashion faux pas?

More fun with Picnik.


Have you committed any decorating faux pas you'd like to share?

Thanks for checking it out.


Tuesday, January 31, 2012

Got Rope?

I've been roping.

Not this kind.

This kind.
(Although I might have let out a "Yippee Ki Yay" when I finished roping my chandelier.)


Rope and twine are big in home decor. 
Haven't you seen it more and more these days?
Check out these wine barrel chandeliers suspended by rope and antique pulleys from Restoration Hardware.


I had some rope left over from a macrame project and here's what I did with it.


You can buy the rope at Restoration Hardware with nice metal finished end hooks, but it's pricey.


$150 - $350


Or you can buy it by the foot for much less at your favorite hardware store.

I hung these these H4H lanterns over my island on either side of a candelier.  To see how I took these $15 lanterns and replaced my can lights with them go here
Swapping out the middle chain for some rope was an inexpensive (free in this case) textural change. 

Here is the heavy metal look.

Here's the new rope look.

 I just removed the chain and looped the rope into the ceiling mount and the candelier. 
I secured it with some twine and it's done. 


I liked it so much I added rope to the chandelier over my dining room table.  Adding it over an electrical cord takes a little longer.  This isn't the the greatest tutorial I've ever done, but it's easy.  First determine the length of rope you need. Make sure you have enough for the loop at the top and the bottom of the chandelier.  Because this was an existing chandelier, I had to remove each link of chandelier chain with pliers.  This is the most time consuming part of the project.  I had to use pliers to open each piece of chain to un thread the electrical wire that was snaked through it.  You will need to support the weight of chandelier during this step.  The electrical cord is not made to support the weight of a chandelier.  Get a friend to hold the chandelier while you work on the rope.  If you don't support the weight of the chandelier, it could pull out of the ceiling and fall, very bad
Unwrap the rope and re wrap it around the wire, starting from the top and working down.  Wrap it as tight as you can because it will untwist sightly when you're finished.  Secure the top with twine and work your way down.   

Secure the bottom, trim the extra and you're done. 

After taking these pictures I realized I needed to trim a little more from the top loop.
Pictures are great for fine tuning projects. 
For some reason it's easier for me to notice what needs tweaking? 

That's better.


Even if you don't have extra rope laying around and you have to buy it, this is a pretty inexpensive project to add some texture to your hanging lights.
 I like the rustic rope with the crystal and metal chandelier.


What do you think?
Heavy metal or rustic rope?
Made any rope projects lately? 
I'm out of rope for now, but I'm looking out for more rope project possibilities.

Thanks for checking it out.


To see more rope projects go here.

Living Savvy

Wednesday, December 14, 2011

Winterlicious Glass Bubbles

Volleyball got canceled this morning so I'm catching up on some blogging time.  It rained all day here yesterday so I finished up some projects and caught up on my taped shows.   
Most rooms in my house are getting a little Winterlicious makeover.


The mantel is complete. 
I made the stockings yesterday, but haven't had a chance to take pictures yet.   
To see how I did the mantel go here.


To further bring in some winter sparkle,
I moved my glass bubbles from outside to in and gave them a seasonal sprucing up.


I emptied out the sand, succulents, shells, and tillandsias and hung them on the curly willow branches next to my vertical pallet garden and my metal hanging basket light.  So far the experimental vertical garden is doing awesome and it's growing.  I added some Christmas balls to the light for some Holiday bling.


I filled the glass balls with faux snow, faux greenery, and a Christmas ornament. 
Gold birds, a snowman, and a Christmas tree. This was a free makeover, I used what I had.


The bubbles make me feel like it's winter here in San Diego, 
Sometimes it even looks like it's snowing inside.
Stay warm birdie.


I don't really use too many snowmen in my Christmas decor, but I like him contained in the bubble.

I tend to put things in glass containers and change them out for the season.
Here's one of my giant Winterlicious snow globes. 
To see more of my snow globes go here.


These glass containers sit on my kitchen counter.


More glass on my island. 
We don't get much snow in San Diego so I have to pretend with my vignettes. 
The glass contains the snow so we don't end up with "snow drifts" all over the house.


Still need to work on my picture taking and getting rid of the glare off the glass. 


Hope your Holidays are warm and cozy even though it's snowing at my house.


Michaela Noelle
Related Posts Plugin for WordPress, Blogger...