
I saw a hanging light similar to this one (without the postcards) in a boutique that cost about $300.
$300 for a lamp that doesn't even come with a lamp shade is crazy talk to me, but I liked it and I wanted one.

I figured I could make one for much less. I love trying to use stuff I already have.
It makes me feel like MacGyver, but I don't have a mullet.

I made this light from things I already had laying around my house.
Sometimes being a "collector"(hoarder) is a good thing.
Sometimes being a "collector"(hoarder) is a good thing.
Here's my version.


I started with one of these from Ikea and I think it was under $5? It was sitting in the garage filled with to much "crapolla."
 You also need two of these metal hanging basket planters. They were sitting on my potting bench unused at the moment. I purchased them a few years back at Big Lots. I think they were around $6 or $7 each? See the clips used to connect the hanging chains to the basket? You will need these later. Take off the chains and save the the clips.
 Take some stiff cardboard and trace two circles a little bigger then the hole in the bottom of the planter. I used a piece of Tupperware to make my circles. The cardboard is from the back of a pad of paper.
Trace two circles.

Cut them out and trace another circle the diameter of the head of the light fixture.

Cut out the inside circle.

You should have two of these.

At this point you can paint your circles black.
I painted them in a later step, but if I made one of these lights again I would paint them at this point.

Unscrew the black ring on the light fixture (see it laying on the table?) Take one circle and screw it on the end of the light fixture. It should be a snug fit.

Hold the light fixture and the cardboard circle up to the underside of the basket. This will become the top or your light.

Turn over the light fixture and the basket and it should look like this.
 Screw on the second piece of cardboard.
Screw the ring back on over the second cardboard circle.
It should look like this. The hole in the bottom of the basket should be sandwiched in between the two pieces of cardboard. The screwed on ring and two pieces of cardboard hold the light fixture and basket together.
A cardboard basket sandwich.
A cardboard basket sandwich.

At this point I spray painted the cardboard. Then I took the second basket and clipped the top and bottom baskets together. When I used just one basket my light looked incomplete and too small so I grabbed a second basket to complete the orb. I used the chain clips to connect the two baskets together.
 I didn't like the the bare white cord.
I used some burlap to sew a cord cover.

I hung it over my desk in the family room from an antique pulley.

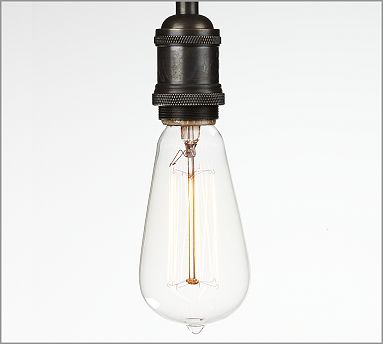
I had this bulb, so until it burns out this is what I'm using. I put it on a dimmer because a bare bulb can look a little harsh. The dimmer allows me to create a soft glow.

I think a filament bulb would look better. Here is one from Pottery Barn. They are $9 and not very green (energy hogs), but they look cool.
 This project was free because I used stuff I already had, but even if you go out and buy the supplies to make this it would only be around $20. If I get tired of it I can reuse the baskets in the garden.

Thanks for checking it out.

Very fun Shannon! Look at you oh crafty one!!
ReplyDeleteLove it. SO cute...how about a second one slightly lower or higher? Even a third?
ReplyDeleteSO handy, you are.
Ooooh, I love this!!!! Very nice job!
ReplyDeleteShannon
You gave those planters an amazing new life. So cute!
ReplyDeletehey i am overfrom csi!!! I found baskets just like these at dollar tree:) I adore this idea!!! thanks for sharing!!!:)
ReplyDeleteThis is really cool! Love that it's hanging from an old pulley too...really completes the fun look. Found you featured over at CSI...think I'll "follow" along :) Laurel@chippingwithcharm
ReplyDeleteLOVE this idea so much...how inventive. I have never attempted making a light before...but now I might try! I am a new follower.
ReplyDeleteHolly
504 Main
OMG! This is like really Radical! Loved it!
ReplyDeletehttp://aliascreativelife.blogspot.com/