Wednesday, May 23, 2012

$4 Jute Light


The Man Cave makeover continues and here is the latest $4 transformation. 
This is the track home, builder grade light in our entry that came with the house. 
I gave it a little makeover last week.


I have never liked this light fixture, but it's 15 feet in the air and I could never decide what to change it out for?  I found nice lights, but if you have been a follower of my blog for awhile, you know I'm a tad frugal when it comes to buying lighting.
It's so much more fun to make my own for pennies less.

This is how the room looked before paint and the light makeover. 


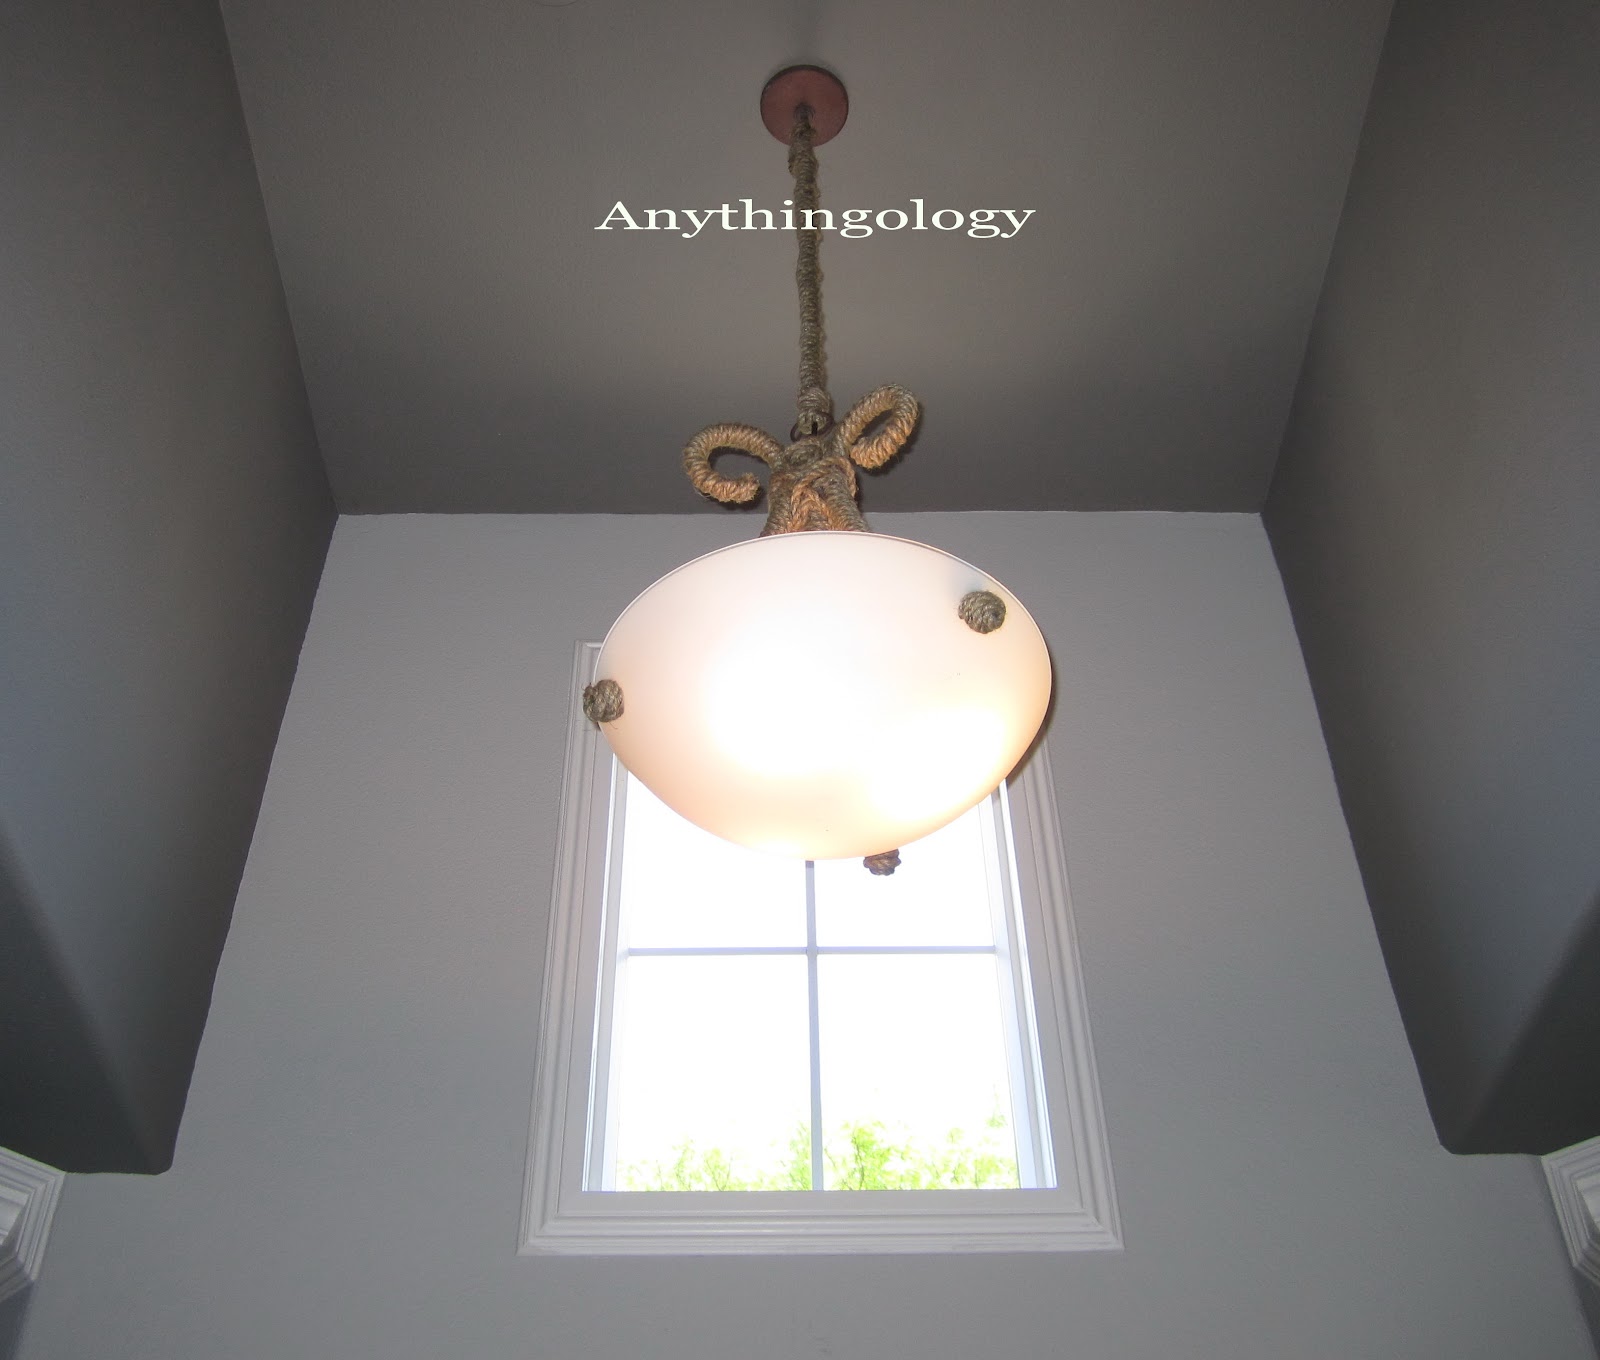
Here is the after.
Painted, new completed crown molding and window casings, and the same light with a jute rope makeover.




I had left over rope from my DIY Restoration Hardware Planetarium Knock Off Chandelier. 
Say that five times fast.
To see how I made this fixture for under $50 with hula hoops, an old brass light fixture, and jute rope go

The electrician was able to come back and add the j box to the ceiling.  What a production, he had a tough time getting the wires through the attic and I got to help fish them through the hole while he crawled in the attic up above. 
I finished off the light with a ceiling medallion.
The room is so much more inviting at night with the new light and it's on a dimmer.


Here is the inspiration for my new entry light. 
Coastal Chic Rope Chandelier from Shades Of Light.
$999
"999 are you out of your mind?"


I took $4 roll of 50' x 3/4" jute rope that I picked up from Big Lots and hot glued and wrapped it over all the metal parts of the fixture.  It's not rocket science.  Just wrap and glue.  It took almost the whole 50' roll of rope.  I taped up my fingers with athletic tape BEFORE I used the glue gun this time.  I'm happy to report no blisters and no cuss words were yelled that would make a sailor blush this time.  I didn't bother to take down the light to wrap it in rope.  I carefully balanced on an extension ladder and wrapped and glued.  I would recommend taking the light down, I'm just lazy. 
It's much safer to do this on the ground.

Here is what it looks like closeup now.  
If I find something better to hang here, I'm only out $4.
Can't beat that.  OK, I guess free beats it.


It'll do for now. 
It only took me eleven years to do something about my most unliked light in the house.
The jute rope is a little fuzzy close up, but from the ground you can't tell it needs a shave.
The ceiling in this entry alcove is 15' high.


Here is a picture of the two lights together. 
They are totally different, but now they go together. 
 I like that they aren't too matchy, matchy.


I love solving design problems with inspiration, creativity, a little DIY,  and not big bucks. 
$4 fits my budget. 


I still have one more roll of jute rope left. 
Who will be my next makeover victim?

Thanks for checking it out.


Friday, May 11, 2012

My leather studded stump

We have all seen pictures of large hunks of wood cut into stumps and re purposed as tables and stools in blog land.  
I found these pictures on Pinterest. 
Not a new idea, but I still really like them.
Pinned Image


I love this trio of stumps painted white from Alicia over at Thrifty and Chic.


Check out my friend Debbie's stump table over at Refresh Restyle.

I never showed you the one I made last year that I use outside, but here is a new one I just made.  
A friend of mine cut down some large pine trees in her yard that were blocking her view and she gave me a couple of the stumps.  They were VERY sappy and I had to let them sit outside for months until they were dry enough to debark.  The spiders loved them.

I used a hammer and a chisel to remove the bark.  Wear glasses to protect your eyes for this part of the project.  I had to re cut some of the branches closer to the main stump with a hand saw because my chain saw was at the shop.  Just kidding, I don't have a chainsaw, but it would have come in handy if I did.  (I'm jealous if you have one) 
It's hard work cutting these by hand.  I should have ditched my flip flops and put on some flannel and work boots, I felt like a lumber jack.   


Once the bark was all gone, I used a belt sander to get a smooth finish. 
I borrowed it from my dad he has all the best tools, but no chainsaw.
The spiders vacated the premises once the bark was gone.


I added four swivel casters to the bottom of my stump for easy moving. 
You can see just the edge of one peaking out from the bottom.


I rubbed some oil on the wood to bring out the grain.

I used more of my leather scraps from my computer desk project and made a pattern out of a piece of newspaper.  I cut out a piece of leather for the top and secured it with left over upholstery tacks.


It's a plant stand, a drum, a coffee cup holder, a place to plant your beer or your butt (not at the same time), whatever.
  The stump was free. 
The leather cost about $8. 
I already had the tacks. 
The lumber jack workout was free too.


Leather, even when it's not padded, is more comfy on the booty than wood.

It ties in nicely to my new re vamped computer desk.


More importantly, I made it for my husband and he loves it.
Done any lumber jack worthy stump projects lately?
I would love to see them.

Thanks for checking it out.

Wednesday, May 9, 2012

Leather and Tacks

Henry's room is coming along slowly.  My blogging time has been limited as of late.  I'm coaching two volleyball teams and my oldest daughter just finished State Cup Soccer. 
I've been out of town the last couple weekends and it seems as if the rest of the week is spent catching up. 

Here is a little project I finished.
I think every Man Cave needs a little leather.
This project is an inexpensive way to add leather to your decor without breaking the bank.


I didn't take any before pictures, but the desk looked similar to this one only NOT as pretty as this cute little thing.  I picked mine up at a thrift store for $20.  Compared to what I see on other blogs, San Diego thrift stores are more expensive than the rest of the country.  My thrift store desk is not even that good of quality.  It had a Bombay furniture sticker on the bottom.  It was originally stained brown, but somone had given it the WORST paint job I have ever seen.  Sloppy paint drips all down the legs with a yellowish, goopy sealer over the white slop.  The legs were wobbly and needed to be re glued.  The only good thing about this desk was the size. 
It was perfect for the corner I planned on using it for and I had been looking for quite awhile for something this size at a price I was willing to pay.

I didn't take any pictures of the redo. 
I fit this project into the little time I have and I neglected the picture taking part.
I'll quit whining now about how busy I am, I know you are just as busy.

After a lot of sanding off drips and glops and re gluing the legs, I spray painted the whole thing black.  Then I sprayed the edges blue.  After more sanding, the desk was ready for a leather top and some studs.  I bought the leather scraps at We Are Fabrics in Solana Beach.  The leather pieces cost $8 a pound and I probably used less than a pound for the top.  I tacked down the leather with a spray adhesive and finished off the edge of the desk and the tops of the legs with left over upholstery tacks from a chair project.


To see other tack projects I've done go HERE


I'm moving the computer to this small desk.
  The leather top not only looks good, it's practical too because now I don't need to use a mouse pad.
The leather will just get better with age.
The border on the concrete floor you see has been painted over because it's too girly for a Man Cave.

Come back and see what other uses I found for the leather scraps and upholstery tacks.


Thanks for checking it out.


Thursday, April 26, 2012

Restoration Hardware Rope Planitarium Chandelier Knock Off

Happy Thursday!
First off I want to thank everyone that left such supportive comments about my last post.  The Downside of Coaching.  I made all the team cuts and talked with every girl and many parents too.  So far the athletic director has received no complaints, so that's good news.  It was a hard day, but it had to be done. 

Some people over eat when they are stressed, I do projects.
I wanted to show you my latest project for my husband Henry's room.  Here is the light fixture I pinned awhile back.  It's from Restoration Hardware and it's on sale for $675.  What a deal!
Not in my budget, so I made my own version for $50.

Sale $675

Rope Planetarium Chandelier Medium

Here is mine that I made for
under $50 and some burned fingers.


This is what I used to make it.
An old $20 light fixture from H for H.  3 hula hoops from Big Lots( total $9.)  The hula hoops at Big Lots came in three sizes.  I chose the medium sized ones.  They are about about 27"-28" in diameter?  I used a total of 4 rolls of 50' x 3/8" rope from Big Lots (total $16).  I didn't know how much rope I needed, so I bought 6 rolls.  I can take back the two extras or save them for another project.  A can of black spray paint that I already had.  Duct tape that I already had. 


First I took the light fixture apart, I only need the guts for this project.  I'll save the glass for another project.  I drilled a hole in one of the hula hoops and threaded the top of the chandelier through the hole and screwed the loop on to secure the end.


Next I duct taped the other two hula hoops to the drilled hoop.  I had to play around with this step to get the proportions right.  It helps if you can hang the chandelier up and step back to check it out from all sides.


Next I spray painted the whole thing black.  I kind of liked it like this and probably will make anther light using the hula hoops without the rope.  I would have to do a neater tape job or hot glue the hoops for a cleaner look.


Next I started wrapping the hoops with the jute rope.
Once I hung it up in the room, I realized I needed to adjusting the hoops to make it look more symmetrical.   The tape pulled the paint off, but it doesn't matter, the rope will cover it up.


I burned my fingers so I had to tape them up with athletic tape for the rest of the project. 
 I have some nice blisters today.


The rope part of the project is very time consuming. 
Wrap and glue, wrap and glue. 
I cut the rope into manageable 6' sections and watched Nate Berkus to pass the time.


I cut the rope into smaller pieces and glued it into any holes I missed.


Do you think I should cover the candle stems? 
I didn't because they are skinny and close together and my fingers needed a break.
Yes, I have a lazy streak.
I predict more burned fingers if I cover the stems.

I can't show you any pictures of my chandelier lit up yet until the electrician comes back to add a J box to the center of the room.  He has been ill and I'm not sure when he will be able to come over? 
Adding the J box is beyond my electrical capabilities. 


The room is coming along slowly. 
I'm always amazed by the bloggers that can do a complete room make over in a weekend. 
I just don't work that fast!
Thanks for checking it out.


To see other lighting projects I've done click on the links below.


 Photobucket

DIY Show Off

Thursday, April 19, 2012

The Downside Of Coaching

Today is going to be a hard day.

I have to crush some young girls hearts.

I don't take it lightly, in fact it is agonizing for me.

The WORST part about coaching is having to cut a player.

I have 65 7th and 8th grade girls trying out for the middle school volleyball team I coach.

I can only keep 15. 
I wish I could keep them ALL.

I don't post a cut list.  It would be so much easier to post a list and not see the disappointment in their faces.  It's just my feeling that a list is so impersonal.  I talk to every kid, some face to face and some on the phone.  I try to encourage them to keep practicing and to not give up.

Those of you with children that play sports, just know coaches don't take these decisions lightly.  We lose sleep over it.  We worry about those kids that we have to let go.  We feel their pain.

I just have to try and not cry while cutting them.

I hate today.  
Related Posts Plugin for WordPress, Blogger...